Home Blog Page 2

The Ultimate Backpacking Checklist for the Perfect Camper

0
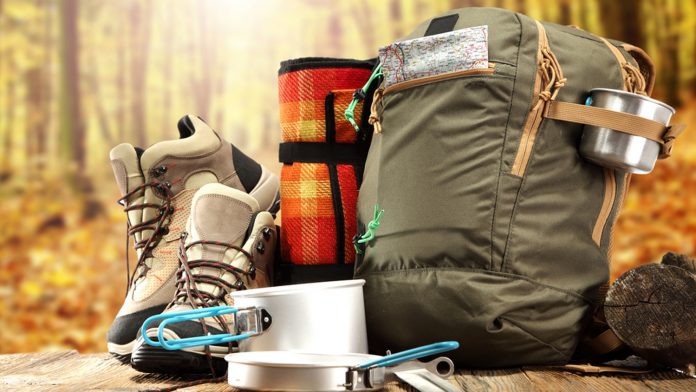
Camping equipment checklist
Camping equipment

Camping is the pleasure of rediscovering simple things and going on an adventure without necessarily going far from home.

But it can quickly turn into a nightmare if you have poorly prepared your camping equipment and essentials are missing.

Prepare your luggage, your bag, and your camping essentials to put in your backpack or trunk, it is the assurance of leaving in peace and avoiding disappointments along the way or once there.

Even if you want to travel light, a minimum of tools, accessories, and utensils are essential for camping with peace of mind.

Here is our checklist of camping equipment to check before leaving.

It will allow you to have everything you need at hand, and probably to help out other less far-sighted campers!

It’s up to you to sort our complete list according to your desires: to go light or comfortable?

The 10 essential things to go Camping

  • Tent with mallet and sardines
  • Waterproof groundsheet
  • Sleeping bag
  • Flashlight and spare batteries
  • Lightweight towel
  • Soap
  • Toilet paper
  • Swiss Army Knife (with a screwdriver, saw, and scissors)
  • First aid kit
  • Trash bags

Camping Equipment for the Tent

Camping equipment for the tent

  • Tent with mallet and sardines
  • Replacement tent canvas
  • Mosquito net
  • Scraper for digging a channel around the tent in case of rain
  • Waterproofing spray
  • Tent repair kit
  • Hanging lamp
  • Electric torch or headlamp
  • Windshield
  • Padlock

Camping equipment for cooking and eating

Equipment for cooking

  • Gas heater
  • Gas cartridge for stove
  • Barbecue, charcoal
  • Stackable cookware
  • Kettle
  • Airtight food containers
  • Sharpening stone
  • Blue icebox and ice packs
  • Aluminum foil
  • Can opener
  • Corkscrew
  • Lighter or matches
  • Thermos
  • Coffee maker for stove
  • Cutting board
  • Pair of scissors
  • Kitchen knife
  • Bottle opener
  • Stove
  • Jerry can or water bag
  • Aluminum foil
  • Economic knife
  • Strainer

Camping equipment for cooking and eating

Staple foods

  • Salt / Pepper / Herbs / Spices
  • Olive oil
  • Vinegar
  • Tea and coffee
  • Sugar
  • Cocoa Powder
  • Milk
  • Pasta and rice
  • Preserves
  • Mustard
  • Dry biscuits
  • Rusks/crackers
  • Water

Utensils and accessories for eating

  • Metal cups
  • Reusable plastic cups
  • Reusable metal or plastic cutlery
  • Reusable metal or plastic dishes
  • Insulated water bottle
  • Folding table
  • Folding chairs
  • Picnic blanket

Camping equipment for sleeping

  • Groundsheet
  • Inflatable mattress
  • Inflator or pump
  • Mattress repair kit (patch, grater, and glue)
  • Pillow
  • Sheet or meat bag
  • Blanket
  • Sleeping bag
  • Alarm clock

Camping equipment for hygiene

To take care of yourself

  • Biodegradable soap or shower gel
  • Shampoo
  • Toothbrush
  • Toothpaste
  • Solar shower
  • Foldable brush or comb
  • Nail clipper
  • Bath towels
  • Q-tip
  • Deodorant
  • Shaver
  • Tampons / sanitary napkins
  • Handkerchiefs
  • Contact lenses + product

For laundry

  • Clothesline and clothes pegs
  • Basin
  • Detergent powder or cartons
  • Canvas bag for dirty laundry

For the dishes

  • Basin
  • Sponge, scraper, dishwashing liquid
  • Tea towels

For general maintenance

  • Broom and shovel
  • Paper towels
  • Toilet paper
  • Garbage bags
  • Sponges or cloths

Camping equipment for pharmacy and health

Camping equipment for Pharmacy and Health

  • Current medical treatment with renewal prescription
  • Earplugs
  • Contraceptives
  • Pastilles to purify water
  • Spray
  • Anti-blister dressings
  • Solar cream
  • Lemongrass or mosquito repellent
  • Venom aspirator
  • Blanket
  • Arnica
  • Disinfectant
  • Cream for burns and sunburns (Biafine type)
  • Anti-inflammatory cream
  • Dressings
  • Tweezers
  • Scissors
  • Sterile bands
  • Pain-relieving analgesic
  • Medicine for motion sickness
  • Tweezers
  • Greasy tulle

Camping equipment for children

  • Paper, markers, and colored pencils
  • Vacation notebook
  • Portable mini-game console / DVD player
  • Diapers, wipes, bottles, powdered milk
  • Sunscreen index 50
  • Sunglasses
  • Soft toys
  • Toys
  • Foldable stroller
  • Nipple
  • Baby bath
  • Bibs
  • Bike/scooter
  • Inflatable buoy/armbands

Camping equipment for Relaxation

  • Portable radio / MP3 player with batteries / charger
  • Laptop/tablet with charger
  • Books/magazines
  • Card or board games
  • Camera and film/memory cards, charger
  • Abroad: adapter for a power outlet
  • Beach rackets
  • Petanque balls
  • Fishing equipment and fishing license
  • Bike, helmet, and bicycle pump
  • Kite
  • Bucket and shovel
  • Mask and tuba
  • Inflatable canoe
  • Beach umbrella
  • Guides/road maps
  • Hiking poles/compass

Camping equipment for small crafts

  • Tensioners
  • Hooks
  • Elastics
  • Sewing kit (threads, needles, safety pins)
  • Do-it-all twine or cord
  • Basic toolbox (screwdriver, pliers, hammer, wrenches)

Best Hike the Batteries to Bluffs Trail

0
Batteries to Bluff Trail

The Batteries to Bluffs Trail is a 2.2-mile widely traveled circular trail near San Francisco, California that contains stunning wildflowers and is suitable for hikers of all abilities.

The route is open all year and provides a variety of activities.

The Batteries to Cliffs Trail is a traditional San Francisco climb on the city’s western bluffs, rich in history and with classic, coastal views.

With a round-trip distance of 1.7 miles, it’s short enough to fit into your San Francisco sightseeing day, or even better, in the evening at sunset.

With wooden steps carved into the bluff, the hike is moderately steep. Views of the Golden Gate Bridge, ancient batteries, and isolated Marshall’s Beach are the rewards for your efforts.

The Presidio, which is part of the Golden Gate National Recreation Area, includes the Batteries to Bluffs Trail.

Consider a dream hike in San Francisco: a trail overlooking the ocean with stunning views of the Golden Gate Bridge, a tranquil spot where you can relax and watch the waves crash, or a scenic route where you can get your morning workout while birds sing and flowers blossom.

This pathway does not need to be imagined; it may be found in the Presidio’s Batteries to Bluffs Trail.

Where do you Park for the Batteries at The Bluffs Trail?

The track starts and ends right next to Lincoln Boulevard, and you can start from either end.

Parking is available on the shoulder of Lincoln Boulevard near the trail’s southern end, although space is limited.

Instead, this path description begins at the Langdon Court parking lot, which is located at the path’s northern end.

The Golden Gate Overlook, as well as Batteries Godfrey, Boutelle, and Marcus Miller, are all within walking distance.

From the parking area, trails go to the batteries, the Golden Gate Bridge, and the Golden Gate Bridge Welcome Center (which has some nice souvenirs).

Park for the Batteries at The Bluffs Trail

Crissy Field Parking:

The walk to the bridge is longer, but there is more parking near Crissy Field’s western end.

Even when the lot is packed on sunny days and weekends, there are usually a few places available.

It’s free on weekdays between 9 a.m. and 5 p.m., with a 3-hour restriction, but there are fees on Saturdays and Sundays from 10 a.m. to 5 p.m. ($1.20 per hour, $7 all day; machine accepts credit cards and coins).

Fort Point Parking:

Along with the approach to Fort Point, there is a medium-sized lot with some parking spaces, as well as another large lot in front of the fort.

The spots sometimes fill up quickly, but if you wait, you should be able to acquire one soon.

Parking is free and there are no time limits, and the parking lot has a beautiful view of the bridge.

It’s a 20-minute climb to the bridge, with part of it being the stairs depicted above.

Welcome Center Parking:

The majority of people try to park here because it is close to everything and quite handy.

This is not a good idea. It is not only limited to two hours but it is also congested with automobiles and tour buses, with queues of cars waiting to park.

Every day from 8 a.m. to 9 p.m., parking is pay-to-park; 25 cents for 15 minutes, $2 for 2 hours, maximum of 2 hours parking. Credit cards, $1 bills, and coins are accepted, but change is not given.

Employee Parking:

There is a larger parking lot on Merchant Road, just west of the Toll Plaza, that is only available on weekends for a $5 flat price.

Because of its proximity to the bridge, this lot tends to fill up on weekends, and it serves as a weekend overflow lot for the more congested Welcome Center lot.

To get there, you can either drive under the bridge from the Welcome Center parking lot or from Lincoln Blvd on the other side.

However, a short distance further will get you to the free Merchant Road Lot.

Merchant Road Parking:

It’s just up Merchant Road from the bridge’s west side staff parking lot.

There is no charge for parking, although there is a four-hour time limit (though I doubt they have someone keeping track of how long people park there).

On nice days, it tends to fill up, though people come and go frequently. The bridge is only a few minutes away and offers some spectacular views.

It’s close to the Battery West remains and the cliff-side walkway that leads to the bridge.

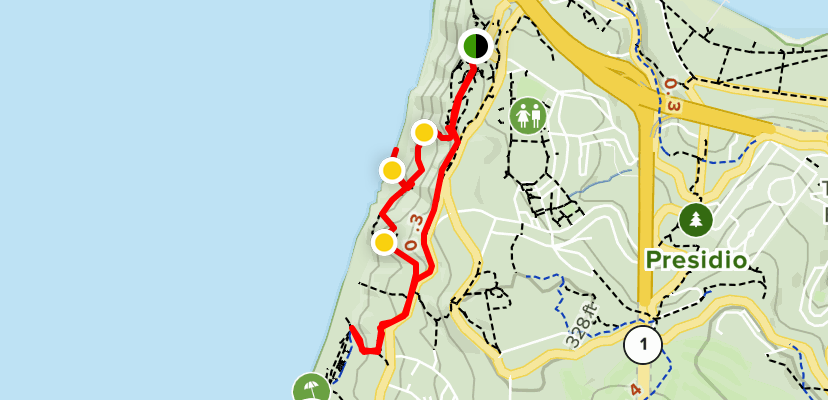
Batteries to Bluffs Trail Map

How long is the Batteries to Bluffs Trail?

Begin your journey at the Golden Gate Overlook, which is located to the north.

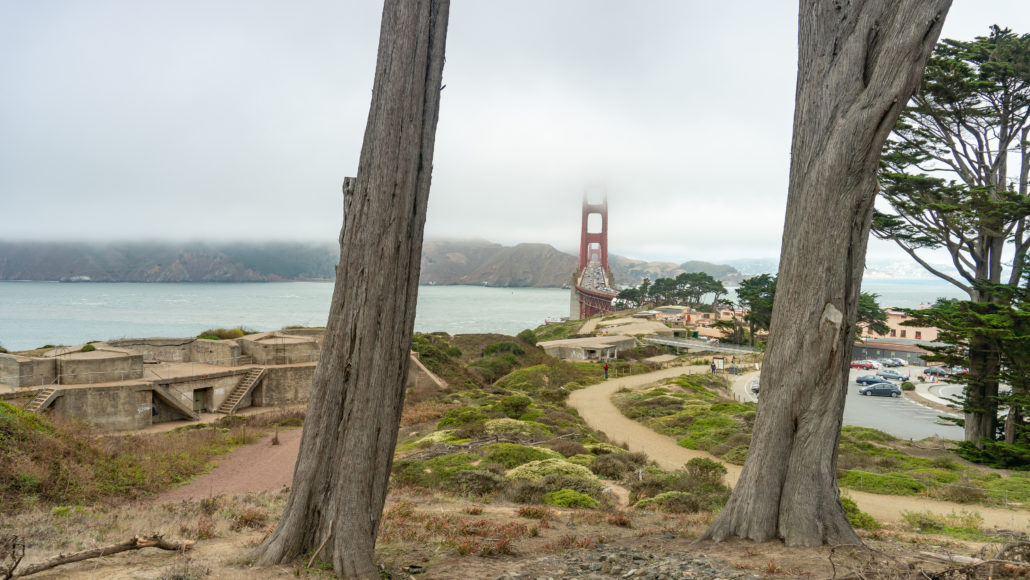
Between two cypress trees, you’ll find a well-photographed perspective of the Golden Gate Bridge.

The pathways leading down to Battery Godfrey and connecting to its northern battery neighbors can be seen from here.

When you’re ready, head south through Battery Godfrey to the southwest edge of the parking area, where you’ll find the Batteries to Bluffs Trail.

With overhanging pine trees and daisy-like aster, the dirt walk is flat and level.

The brick door you pass by is an ammo magazine, which houses the battery’s ammunition. At 0.3 mile, you’ll come to an overlook.

Marshall’s Beach is below, with the Golden Gate Bridge to the north and the Point Bonita Lighthouse to the west.

The serpentine, California’s state rock, is the blue-green tint you observe on the cliffs.

Return to the Batteries to Bluffs Trail when you’re ready. Because the route ends at Marshall’s Beach, you’ll have to ascend 250 feet to reach the path’s finish at Lincoln Boulevard.

I’ve categorized the elevation gain as 500 feet because there are ups and downs on this pendulum-swing climb.

Cumulative gain compares the difference between the highest and lowest points on the trail to net gain, which quantifies the difference between the highest and lowest points on the trail. On the Coastal Trail, I started at the bridge viewing area.

With all of the wildflowers nearby wild mustard, wild radish, thistle, and so on — now is an exceptionally ideal time to stroll this and other paths. The east trailhead is a short distance from Langdon, just off Lincoln Blvd.

The west trailhead is roughly 0.7 miles away, at the top of Battery Crosby. From the battery, a short walk goes up to Lincoln.

As you look down from Lincoln, you can see more of the BTB now that several trees have been cut and removed.

There is an alternate trail that leads directly to the Batteries to Bluffs west trailhead from Lincoln.

This was done today; there were several tree roots to go over and one tough point. Take it easy here. On one side of the trail, a weak fence zigzags.

The Batteries to Bluffs trail is largely wood steps with a few short paths in between (no railings save on one side of the small footbridge).

The final step down from the footbridge is now quite steep; it wouldn’t surprise me if a couple of additional steps were put here in the future. The vista must be seen to be believed, particularly on a clear, sunny day.

Bring your camera, but note that dogs are not permitted on this trail. Today I counted 339 steps from the west trailhead to View Point, a viewpoint with a bench.

There is a smaller pathway (approximately 48 steps) that leads down to quiet Marshall’s Beach from the main Batteries to Bluffs walk.

The west trailhead is toward the top of the Sand Ladder, above Baker Beach (approximately 253 steps from Lincoln to Baker Beach).

From Lincoln, you may also reach the Connector Trail, a lengthy wood stair that leads to Immigrant Point Overlook and Rob Hill Campground (about 208 steps).

The foot of the Connector Trail can easily be seen as it ascends from the crosswalk on the south side of Lincoln; good info signs and trail markings can be found throughout the park.

How do I get to Marshall Beach?

Marshall’s Beach is a secluded beach in San Francisco with breathtaking views. Although this beach is the closest to the Golden Gate Bridge, few people visit or even know it exists.

Marshall’s Beach is a little beach, only approximately 1000 feet long, but it feels private and uncrowned because so few people visit.

There are a few people walking up and down the trail on a nice bright afternoon, but the beach is otherwise deserted.

Except for a couple of naked sunbathers. It’s a short walk down to the beach along with the Batteries to Bluffs pathway.

The walk is made up of both robust wooden stairs and dirt walkways that are quite flat. There’s nothing particularly slick or steep.

The dirt trails can be muddy and slippery after a storm, but it’s otherwise a well-kept track.

Only on the way up does the hike appear to belong. However, while you’re resting, you can take in the scenery.

The Golden Gate Bridge is right there, and you can see the Marin Headlands across the river and part of Baker Beach to the south from the route.

The Golden Gate Bridge is the closest beach at this location.

However, getting to the beach takes some effort. The walk down to the beach from the bluffs is long, and the climb back up is a great challenge! It is, nonetheless, worthwhile.

From the Golden Gate Bridge to Baker Beach in the south, the Batteries to Bluffs Track is a popular hiking trail that travels along the cliffs.

A deviation branching off the main trail about halfway down the trail leads down to Marshall’s Beach.

The trailheads are the starting points. There are two trailheads for the Batteries to Bluffs along Lincoln Blvd: one is near the bridge and the other is further south, immediately off Langdon Court (aka Overlook) parking lot.

You can start at either end of the Batteries to Bluffs walk to get to the beach, but it’s much easier to start at the northern end (closer to the Golden Gate Bridge).

The northern end is significantly closer to a parking lot as well as bus stops. It’s difficult to get parking near the trail’s southern end (there are only a few spots along the road), so you’d have to park at Baker Beach.

That would entail walking a little distance down the beach to the sand ladder, ascending the ladder all the way up to the road to reach the Batteries to Bluffs trailhead, and then descending a long, steep flight of stairs to Marshall’s Beach.

The hike would take at least three times as long and include much more difficult climbing.

How long is Bay Area Ridge Trail?

The Bay Area Ridge Trail is a 550-mile multi-use loop that encircles San Francisco Bay’s highest and often most picturesque spots.

The public has access to 340 miles of the loop, including the 2.5-mile part that runs through the Presidio.

The San Francisco Bay Trail, the Golden Gate Bridge Trail, and the Presidio Trail all pass through the Presidio on their way to the Golden Gate Bridge.

The Bay Area Ridge Trail begins at Arguello Gate and follows the northern perimeter of Presidio Golf Course, eventually merging with the Juan Bautista de Anza National Historic Trail and the California Coastal Trail.

It comes to a close near the Golden Gate Bridge.

Along the journey, there’s a lot to see and do. Indeed, because there are so many different things to see, such as the Presidio’s forest, three scenic overlooks, and several must-see historic and cultural points of interest,

such as Spire, artist Andy Goldsworthy’s striking 100-foot sculpture made of felled Monterey cypress trunks, this trail may be ideal for those who enjoy variety.

The Bay Area Ridge Trail also passes through Rob Hill Campground, the Presidio’s lone campground, which is located on four acres at the park’s highest point.

Trails in the Bay Area are well-used by a wide range of recreationists.

While parts of the more distant parts are almost entirely used by trekkers, many of the paths are also open to bicycles and horseback riders.

Notes:

  • There are no restrooms in the Langdon Court parking lot. The closest are across Lincoln Boulevard from the Langdon Court parking lot at Fort Scott Field.
  • Parking is free at Langdon Court parking lot, and there is no entrance fee to hike the Batteries to Bluffs Trail.
  • You can also park along Lincoln Boulevard south of the Batteries to Bluffs Trail here. Space is limited.
  • Dogs are not allowed on the Batteries to Bluffs Trail.

PARKS: Presidio of San Francisco

DIFFICULTY: Strenuous

LENGTH: 0.70 miles round-trip

Chartering a Yacht in the Florida Keys

0
Yacht in the Florida

The Florida Keys is a place where tourists can enjoy the sun, sand, and warm water.

It is a popular tourist destination with more than two million visitors every year who love to stay there for part of the year.

Tourists explore this beautiful region through kayaking and snorkeling, visiting the historical sites of Key West, or even just driving along the Overseas Highway.

Experience the perfect getaway by chartering a yacht. The Florida Keys have so much to see. There is always something here for everyone!

Why Charter a Yacht in Key West?

Key West is a popular tourist destination due to its entertainment, beautiful beaches, and rich marine life. Chartering a yacht in Key West is the perfect way to experience all three.

One of the best things about Key West is that it has a range of options for yachts. It is easy to find a boat that suits your needs and budget. You can even take a short boat trip to the Bahamas!

Yacht Rental in Key West: Everything You Need to Know

Yacht Rental in Key West Florida

Renting a yacht is a great way to experience the water in a whole new way. But before you go ahead and sign up, there are some things you should consider.

Keep these in mind:

  • Some yachts come with rental equipment included, while others do not
  • You can opt to rent by the week or by the day
  • Find out how much fuel costs will be and whether or not you need to bring your own food

What Types of Boats are Available for Rent?

Knowing what type of boat you’re looking for will help you narrow down your search. There are pontoon boats, fishing boats, and party barges.

Pontoon boats are best for fishing trips. Fishing boats offer a larger deck space than pontoon boats which is perfect for many activities as it has storage space for extra gear.

Party barges offer more luxurious amenities, including a full-size bar and kitchenette plus lower decks to allow guests to stand upright.

When is the Best Time to Charter A Yacht in Key West?

The Key West is the perfect choice for a yacht charter all year round. Even in the winter months, there is hardly any frost. There is always plenty of fresh ocean breeze.

From late May to October, occasional showers happen, but the rain seldom lasts the entire day. Water temperatures are warm throughout most of the year.

How Much Does it Cost to Rent a Boat in Key West?

Charter rates in Key West differ depending on the size of the boat, the number of cabins, water toys, amenities, how much time you want to rent it for, and the season.

It is best to contact our charter specialists, who can help you choose your dream yacht that fits your needs and budget.

Charter a Yacht

Charter a Yacht

The Florida Keys offers visitors an escape from the hustle and bustle of everyday life with its warm weather, crystal clear water, and unique architecture.

With Key West Yacht Rentals you will experience an active adventure tour, relax on a sunset cruise, or dive into endless coral reefs full of exotic marine life! With the years of local knowledge to draw upon, their goal isn’t to simply book you a yacht.

It’s to match you with the perfect yacht for your needs and make it unforgettable.

Top 20 Waterfall Hikes Bay Area USA: Full Details

0
Waterfall Hikes Bay Area USA

After the spattering of rainfall, the Bay Area’s gorgeous rivers have gotten a pleasant little lift.

Obviously, the more it rains, the more water you’ll see in waterfalls, and most of these waterfalls are doing all right.

Even if they’re a touch low on supplies, they’re all in lovely locations and well worth the journey. Rainfall, rather than snowmelt, is the primary source of water for area waterfalls.

So, if you want to witness a waterfall with a powerful water flow, go during the rainy season, which is in full swing during the winter and early spring.

True, certain waterfalls, such as Berry Creek Falls, run all year; however, they are more likely to be a trickle in the summer than in the winter.

Another option is to keep an eye on the weather and wait for a couple of good storm systems to pass through.

You have a decent chance of viewing plumped-up falls if you hike following a series of severe storms. For high water, mud, and puddles on hikes, don’t forget your waterproof footwear.

Here are the Best 20 Waterfall Hikes Bay Area

Best 20 Waterfall Hikes Bay Area
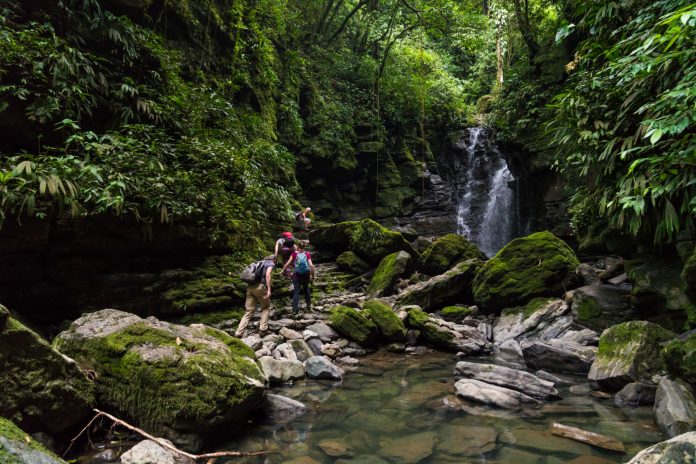
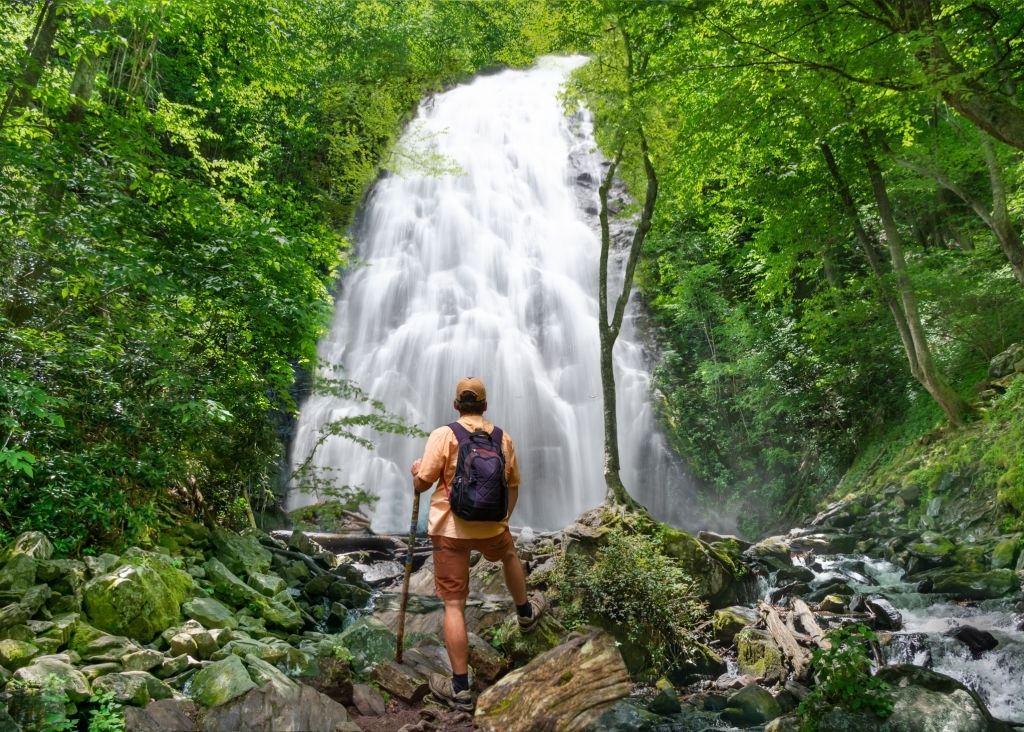
Man with backpack hiking in in the forest on summer vacation trip. Crabtree Falls just off the Blue Ridge Parkway. Blue Ridge Mountains, North Carolina, USA.

Alamere Falls Hikes

Alamere Falls Hike Details
  • Distance: 13.8 miles (8.3 miles with “shortcut”)
  • Elevation Gain: 1,955 ft (990 ft with “shortcut”)
  • Difficulty: Moderate.
  • Estimated Hike Time: 7 hours.
  • Trailhead: Palomarin Trailhead.
  • Trailhead Facilities: Pit toilets and trash and recycling bins.
  • Pets: No dogs allowed.

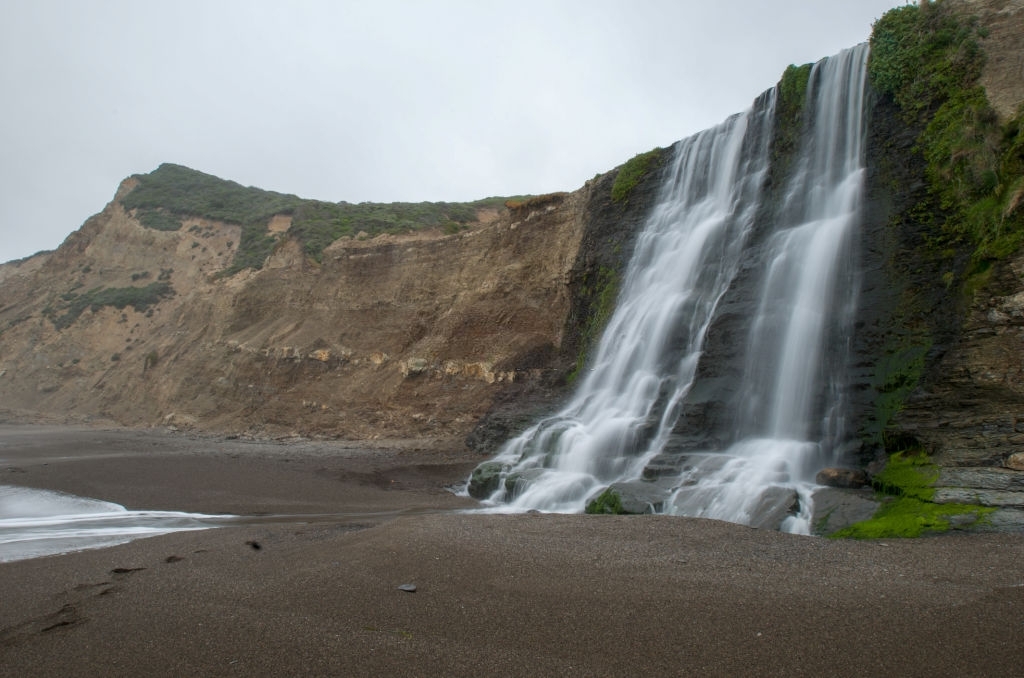
Alamere Falls is the Bay Area’s rock star waterfall.

Alamere Falls Hikes

It’s not only one of the most visually stunning falls, cascading directly onto the beach, but it’s also one of the most consistent high-flowing falls in the area.

The hike to Alamere Falls is the longest on the list, though it is very flat for the most part.

The first mile follows a 300-foot cliff overlooking the lake, with the rest of the trail passing between covered woodland and exposed chaparral.

You’ll have to scramble 60 feet down a gravelly cliff to get to the beach. It’s nothing out of the ordinary, but you’ll need to use your hands.

Cascade Falls Hike

Cascade Falls Hike

Cascade Falls
  • Difficulty – Easy.
  • Time 0.5 hours.
  • Round-Trip 0.75km. (Roundtrip Length: 6.8 Miles)
  • Elevation Gain – 40 meters. (430 Feet)
  • Season April – November.
  • From Vancouver – 1 hour, 30 minutes.
  • Dog Friendly – Yes.

This is a short hike to a beautiful waterfall that you may undertake on the spur of the moment if you’re in the area.

Near the trailhead, there’s a “community nature journal” in the driveway of 690 Cascade Drive.

It features some fantastic kid drawings as well as an accurate depiction of the actual status of the falls.

Cascade Falls Hike usa

San Anselmo Creek crosses the main trail several times, but it is typically dry except during periodic storms.

There is an alternate pathway that follows the north side of the creek with one bridge crossing immediately before the falls in case of high water.

When you get to the end of the walk, there’s a great view platform and a couple of enormous stones just in front of the falls.

Cataract Waterfall Hikes

All of the falls on our list are amid beautiful scenery, but this one is especially worth seeing for the trip to the trailhead.

The major falls are located just east of Ridgecrest Boulevard, but Alpine Lake is the most popular starting location.

On your way to Laurel Dell, a picnic place just past Cataract Falls, you’ll encounter several falls along Cataract Creek.

It’s a challenging climb, but it’s well worth it when you witness the next waterfall along the road.

Trees cover almost the whole trail, and moss blankets every surface that isn’t being walked on. It’s the kind of place where fairies and gnomes would be expected.

Dawn Falls Hikes

The walk takes you right up to the falls’ ledge, where you can see a 30-foot plummet to the streambed below.

On the route to Dawn Falls, you’ll pass by a lesser waterfall that, while not nearly as impressive, is well worth seeing.

And Baltimore Canyon as a whole is just stunning. I can’t picture anyone being disappointed, regardless of how much water is in the creek.

Elliot Creek Waterfall Hikes

Just south of Ao Nuevo State Park, Elliot Creek empties onto the seashore. You’d never believe there was a waterfall right off the highway if you drove past it a hundred times on your way to Santa Cruz.

There are a few more within a few miles, but this one lasts longer after a big rain than the others. This waterfall also has the uncanny ability to reveal fossils.

Between San Francisco and Santa Cruz, the Purisima Formation, which is three to five million years old, runs along much of the shoreline.

At low tide, slabs of smoothed rock loaded with shells can be found strewn across the beach.

Crystal Creek Falls

Though you might not realize it, Lower Crystal Creek Falls is the only “man-made” waterfall in the Whiskey town National Recreation Area.

The diversion of a substantial amount of the Trinity River into Whiskey town Lake, and then down into the Sacramento River, was an important component of the Central Valley Project when it was designed in the 1920s.

The water was transported underground from Trinity Dam to Carr Powerhouse through a 17-mile tunnel, and the tailings were discharged at Crystal Creek Falls.

Pit River Falls

One of Nor Cal’s most underappreciated waterfalls is located upstream from Lake Britton on the Pit River in a deep canyon.

Pit River Falls is a 30-foot-tall volcanic ledge that flows into the riverbed below.

The reason this waterfall isn’t more well-known in our area is that it’s quite difficult to reach.

Because traversing the canyon is nearly impossible, most visitors arrive at the falls by raft or kayak.

With many channels to launch down the waterfall, this has become a refuge for kayakers from all around Northern California.

Bassi Fall

Bassi Falls is a 4-mile round-trip trek along Highway 50 near Pollock Pines, California.

This is a short, simple hike to a spectacular waterfall. When you get to the bottom of Bassi Falls, you’ll be rewarded with a breathtaking vista of the full 120-foot fall.

There’s also a hard trek to the top of the falls to see Bassi Creek hurtle over the edge (cautiously).

Root Creek Falls

Root Creek Falls, located right below Castle Dome in Castle Crags State Park, is a massive, multi-tiered waterfall.

Though the climb to Castle Dome is widely regarded as the best in the park, Root Creek and Root Creek Falls are not far behind.

Hikers can access Root Creek via a variety of ways. This is a tiny collection of trails that lead to the Root Creek Falls vista point, and they all eventually lead to the creek or the vista point.

Looking up from the viewpoint, you can see the sheer falls set against the wild and harsh crags, with white clouds looming even more behind.

 Kings Creek Falls

The thundering cascades of King’s Creek Falls are among of Lassen Park’s most impressive falls, reaching a height of roughly 40 feet.

They are popular with hikers and photographers alike. The waterfall is a remarkable transition – the leisurely, meandering tiny stream that we drove past and hiked alongside has transformed into a crashing and gushing waterfall.

It’s a spectacular perspective, and standing at the base puts you right in the middle of the metamorphosis.

Phantom Falls

Table Mountain, in Oroville, is haunted by a flowing phantom. During the summer, it vanishes and spends the rest of the year concealed in distant Coal Canyon.

Its evil beauty is extolled by the fortunate few who come across it. Phantom Falls, a 134-foot narrow cascade at the bottom of Coal Canyon, seems to be drawn to the wet, dismal months of winter (only fitting, right?).

Phantom Falls is one of the loveliest sights in the North State when the clouds clear for a few days and the wildflower displays are at their peak in February-April.

Hedge Creek Falls

Hedge Creek Falls cascades in front of the opening to a 12-foot-high cave, similar to the hiding entrances featured in Batman movies and the Legend of Zorro.

The small waterfall barely hides the not-so-secret cave, so you won’t run into any masked heroes on your way to the attraction.

Nonetheless, the drive to Dunsmuir, CA is well worth the trek to Hedge Creek Falls.

The Hedge Creek Falls Trail offers spectacular vistas of the Sacramento River and Mt. Shasta in addition to the cascade.

Potem Falls

In recent years, it has become a favorite camper’s weekend swimming spot. The Potem Falls swimming hole is an appealing alternative for families because it is only a quarter-mile stroll.

Take a trip to the falls during the middle of the week if you want some peace and quiet. Potem Falls is also a great place for a romantic date.

As you approach the narrow but beautiful Potem waterfall, you’ll notice a huge pool ideal for swimming and relaxing.

Feather Falls

Feather Falls in Oroville was once thought to be the sixth tallest waterfall in the United States before it was accurately measured.

The falls are not 640 feet tall as frequently believed, but rather 410 feet tall (pretty impressive either way).

Feather Falls Trail allows hikers to witness the waterfall in its entire splendor all year. Many hikers consider Feather Falls to be one of Northern California’s most magnificent views.

Whiskey town Falls

The stairway that runs up the left side of the waterfall provides tourists with a close-up view of the rushing water as it flows down the granite face of the fall.

Because the stairwell can become wet and slick, proceed with caution and hang on to the handrail as you mount the fall.

The trip also provides a fascinating historical perspective on the economic activities that shaped Shasta County because the trail winds across old logging routes.

Another appealing feature of the climb is that running water runs parallel to the pathway the entire way, making the trip much more enjoyable on a hot summer day.

Mount Diablo Waterfall Loop

In the parched Mount Diablo State Park, a waterfall isn’t the first thing that springs to mind, but surprise!

This 6.0-mile loop hike on Mount Diablo’s northern flank explores a series of small but lovely waterfalls along the Falls Trail.

The hike begins at the end of Regency Drive in a Clayton community, ascends through oak savannah to the vistas of Donner Canyon, and then turns clockwise past wildflowers, rock formations, and waterfalls for a scenic punch before returning down Donner Canyon Road.

Berry Creek Falls

If you’re looking for something a little more challenging than these shorter walks, look no further than Big Basin’s Berry Creek Falls Loop.

The 11-mile loop takes you past three beautiful waterfalls: Berry Creek Falls, Silver Falls, and Golden Cascade, all of which fall between 30 and 70 feet.

Set up a full day to take on this challenging journey through California’s oldest state park, which will take you up a thousand feet in height.

Murietta Falls

If you happen to be around Livermore, this waterfall walk is worth a try, especially if you are a seasoned hiker.

A trip to Murietta Waterfall, unlike the other falls routes, is quite long, taking four to five hours to complete.

In addition, this waterfall trek is often regarded as one of the most difficult, if not the most demanding, in the San Francisco Bay Area.

Along the route, you’ll come across a bunch of large rocks and muddy walkways.

However, once you reach the top, the breathtaking views of the falls will stay with you for a long time.

Little Yosemite Falls

You might not have enough time to visit Yosemite National Park. But don’t worry, if you can’t reach the huge, you can always attain the small.

Little Yosemite Falls, located in Sunol, offers views of the cascade and oak trees that rival those found in the national park.

The hike is short and easy but keeps in mind that the water at Alameda Creek is so clear and fresh that you might be tempted to swim.

McCloud Falls

McCloud Falls, just outside of Mount Shasta, California, is actually made up of three separate waterfalls, each with its own personality.

The Upper, Middle and Lower tiers of McCloud Falls provide visitors one of the great outdoor experiences in Northern California.

It’s a lovely hike to see all three waterfalls, and there are some wonderful swimming and recreation possibilities during the summer months.

Climbing Challenging – The Forest Climbing Axe

0
The Forest Climbing Axe

It’s dubbed a Climbing “Axe,” but it’s not an axe and won’t chop down trees. It can be used as a weapon, though it causes less damage than the Plane Axe, despite the fact that it swings quickly.

Of course, it might also be used for ice and snow climbing.

To provide the best durability, ice axes and ice tool picks are usually generally composed of a steel alloy.

The shafts, on the other hand, are made of a range of materials, with steel being the most durable but also the heaviest.

However, the extra weight of a steel-shaft ice tool may make it simpler for you to penetrate hard ice, particularly if you’re just getting started and haven’t fine-tuned your swing yet.

How to Get the Climbing Axe in the Forest?

How to make Axe in Forest

The first step is to chisel a hole in a mild low-carbon steel block. This will be the location of the eye. The eye is stretched to the required size using a mandrel.

How to make Axe in Forest

The tougher cutting edge is formed by chiseling a notch in one end of the billet and inserting a wedge-shaped piece of alloyed Bohler K460 tool steel into it.

The axe is now heated to a dark golden hue and sprinkled with borax. The oxidation scale is liquefied and washed out of the welding joint with melted borax.

The axe is heated to a bright yellow flame and forged once more, this time such that the two pieces of steel forge fuse together.

The blacksmith then moulds the axe’s head and smoothes the rough edge. The steel must then be annealed to reduce the interior tensions created during the forging process.

Parts of Climbing AXE

Head: The head, which is made up of the pick and adze, is nearly generally made of a strong steel alloy. Only an axe that spends the most of its time in your bag makes sense with an ultra light aluminum head.

Pick: This is the pointy end of the climbing axe’s head. It’s employed for hooking and swinging, which is a fundamental self-arrest move. The majority of the choices have a traditional curvature. (Ice-climbing axes have reverse-curve picks because they are angled better for ice-wall penetration.)

Adze: This broad, hoe-like characteristic is mostly utilized for cutting steps or seats. (The adze is frequently substituted with a hammer in climbing axes.)

Carabineer hole: This hole in the head of a climbing axe is used to clip a carabineer or attach a climbing axe leash (and some leashes attach via a carabineer).

Shaft: Because aluminum is lightweight and sturdy, almost all shafts are now made of metal.

  •  Straight shafts are perfect for general mountaineering because they allow you to use the axe as a supporting cane on low-angle terrain and dive when you need to self-belay or anchor with the axe.
  • Curved shafts feature a minor bend in the middle that allows for clearance. For hilly terrain, curved staffs are best. (For a more ergonomic swinging motion, climbing axe shafts have a considerable curvature.)

Shaft grip: It’s easier to grip the shaft and swing the axe because it’s more comfortable.

Spike: This is the axe’s sharp bottom point. It’s used to provide a firm foothold while walking or to make plunging the axe for a belay or rescue easier. A few non-mountaineering axes conserve weight by cutting the shaft at an angle to perform a comparable function instead of having a spike.

The Forest Chainsaw: (How to make and Benefits)

The Forest Chainsaw

The powerhead, bar, and chain make up a chainsaw. The saw is handled via two integrated grips on the power head.

The bar is composed of flat steel and has grooves bored onto the edges for the chain to run through.

They might have a solid tip or a sprocket attached in the tip. A sprocket improves efficiency while also reducing wear on the bar and chain.

The risk of kickback is influenced by the diameter of the bar tip.

Kickback occurs when the chain catches on the material and forces the bar’s tip up, causing the chainsaw to rotate around the handle. This perilous situation has the potential to badly hurt the operator.

Kickback is less likely with a smaller tip diameter. In the event of kickback, all current chainsaws contain a chain brake that can stop the chain instantly.

A bar that runs across the front of the chainsaw’s top handle activates the brake.

When the saw returns to the operator, the chain brake bar is forced against the operator’s arm, operating the chain brake and disengaging the chain before it can strike the operator.

Pitch refers to the distance between three rivets in the chain; gauge refers to the width of the driving link, and cutter teeth refer to the number of teeth on the cutter.

Some chains are labeled “safety chains” because they have specific links and design elements that reduce the risk of kickback.

Forest Chainsaw Benefits

  • The major benefit of utilizing a chainsaw is obvious: speed. With a handsaw, it would be difficult to spend a whole day chopping your way through a forest, but you could surely do so with a chainsaw.
  • A little rough arithmetic explains why a chainsaw is 5–10 times faster than a regular handsaw. Consider how many planks of wood a single, trimmed tree trunk could produce: perhaps ten or fifteen?
  • Consider how time-consuming it is to saw through a single plank with a handsaw; sawing through an entire tree will take at least ten times as long, assuming you don’t run out of energy or your saw blade melts first.

Elk River Hiking Trail: Best Domestic Hiking Trails in Kansas United States

0
Elk River Trail

The Elk River Trail is the primary attraction at the Headwaters.

The trail begins as an ancient logging road that winds its way down the Elk River, gradually undulating up and down. The first mile is paved, with the next two miles consisting of packed gravel.

The trail soon becomes single-track, switchbacking up a hill among second-growth redwoods before coming to a brief loop in an old-growth section.

The entire trail is well-maintained and can be hiked at any time of year. In the winter, though, there may be some muddy sections, especially toward the top.

The view is pleasant, but nothing special. Because the canopy hasn’t grown back over the road in most areas, the first three miles of mainline logging routes are usually sunny and open.

There is no road noise or other evidence of civilization on the trail, which is located in a remote, relatively narrow canyon. The Elk River’s dashing is the only sound.

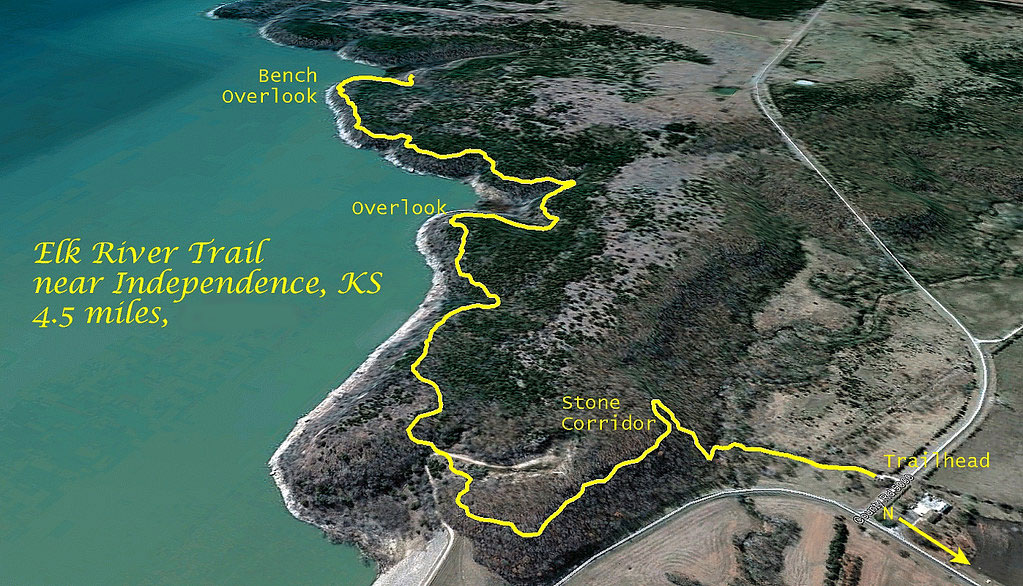
Elk River Hiking Trail Map

Elk River Hiking Trail Map

On the northwest side of Elk City Lake is the Elk River Hiking Trail. The path is a 15-mile point-to-point track with two trailheads to choose from.

The Northeastern trailhead is located across from the Fish & Wildlife Office, below the dam’s west end. Highway 160 south of Elk City leads to the Southwestern trailhead.

Several gravel roads intersect the route and can be reached from County Roads to the north of the lake.

The route begins near Elk City Lake, about a mile west of Independence and north of US Highway 160.

Highway 101 is about a 10-minute drive from the trailhead. Take Highway 101 south from Eureka.

Take the Elk River Road exit just outside of town (small brown Headwaters Reserve signs point the way).

Turn left onto Elk River Road, cross the expressway, and turn right. This lovely route winds through a lush green valley, passing by two covered bridges on your right.

Continue to the end of the road, where the trailhead and parking lot are located.

Route Description for Elk River Trail

Route Description for Elk River Trail

Hiking along the Elk River Trail is a lovely experience. It’s also convenient because there’s just one trail to follow, which leads to Landslide Lake.

Start your trip from the parking lot along the wide trail and climb a few switchbacks to gain a tiny notch.

Descend to the Elk River on the opposite side. The river can be as peaceful as a cucumber or as turbulent as a roaring river depending on the time of year.

Continue up the Elk River Valley on the Elk River Trail, which follows the river in a zigzag pattern.

The Elk River Valley has regenerated and returned to a beautiful region after being logged for the war effort in the 1940s. The ambiance of this trip is simply fantastic, with gigantic trees, amazing mosses, and wonderful fauna.

Two campgrounds are located along the route. Each has a toilet and a bear hang for your food.

They both provide excellent camping opportunities for those who want to split the distances and make this a backpacking trip.

After passing through the second campground, you will reach a wooden bridge that will allow you to cross the Elk River.

On the other side, you’ll come upon a stony slab. Here, turn right and follow the river, keeping an eye out for a large cairn that marks the way.

Switch back up the final steep part of the hike to Landslide Lake to complete the journey.

You’ll ultimately reach the top of the ridge and be at the base of one of the park’s most stunning mountains.

Camping at Elk River Hiking Trail

There are 95 modern campsites with 30 or 50 amp electric and water hookups at the campground.

Sewer hookup, contemporary restrooms with showers, trailer sewage dump stations, group shelter, fishing piers, accessible fishing dock, and playground amenities are all available at the eleven sites.

Camping at Elk River Hiking Trail

Camping is permitted in the state park campsite and south of the county road along the Table Mound Hiking Trail. The Memorial Overlook Trailhead near the dam and the state park trailhead both have restrooms.

The trail is rather flat at first, but as you proceed, you will find yourself climbing up and down hills on a regular basis.

The Elk River Trail is 977 feet above sea level, which makes for some challenging hiking in Kansas. The abundance of filterable water was a huge benefit on this trail in terms of water.

That is something you will appreciate if you want to hike the Elk River Trail on a hot day.

We went along the Elk River for about seven miles before setting up camp if you start on the west end of the trail.

There is a densely forested area with fascinating limestone cliffs. There are numerous rustic campsites placed along the trail, making an overnight trip simple.

After around ten kilometers on the path, you’ll reach Elk City Lake. And if the vistas weren’t enough to amaze you before, you’ll love the atmosphere this place has to offer.

It is recommended that you take the last 5 miles slowly to properly appreciate your surroundings. Enjoy the scenery as well as the fauna, particularly the waterfowl.

Tips for Camping

Tips for Camping Elk River

  • Wear high-quality footwear. This is rough terrain. Without suitable shoes, the trail’s rocks will wreck havoc on your feet.
  • Make sure you bring lots of water. We each brought about 4 liters of water, which was barely enough. It was also a pleasant autumn day.
  • Food should be brought. You’ll burn a lot of calories, so you’ll need something to keep your energy levels up.
  • According to the trail map at the trailhead, the trip will take 11 hours. We took 8, but we moved swiftly because we knew the sun would drop early.
  • Consider backpacking into camp and hiking out the next day if you have the equipment. This is one of the few sites in Kansas where you may go backcountry camping.
  • Bring a camera that is well charged and has a large memory card. There are a plethora of natural elements to capture.
  • When you’re done hiking, have several full water bottles in your vehicle. There’s a strong chance you’ll have consumed all of your water and will appreciate having more available when you’re finished.
  • While trekking, take a break from time to time to look about and be astonished. And keep in mind that this is life in its purest form, right now.

Sardinia Italy by Motorhomes – A Unique Travelling Experience

Sardinia by camping-car

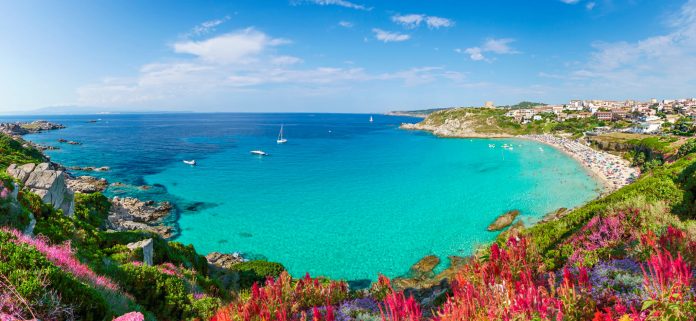
Sardinia Italy is one of the most popular destinations in the world thanks to its fine sandy beaches and its clear sea with its thousand shades of blue.

The authentic villages, the traditions, and the marked culture of the island give it a certain charm for thousands of years.

Privileged by Italians and foreigners alike, especially during the summer, Sardinia can be visited at any time of the year.

Every corner of the island can be explored, from the coast to the hinterland, making it an ideal destination for motorhomes.

Follow our itinerary to travel around Sardinia in a motorhome and experience an unforgettable journey to discover the Sardinian treasures.

Travel from Airport to Sardinia With This Handy Guide

Airport to Sardinia

People from all over Europe flock to Sardinia for their annual summer holidays and it is easy to see why.

Sardinia has a wealth of natural areas, including a marine reserve, as well as an agreeable Mediterranean climate.

Where is Sardinia

Sardinia is an island with mountainous terrain and some unusual geological features.

Tourists visiting are advised to consider driving a four by four car to navigate areas like the Gennargentu massif range, the Punta La Marmora peak (which rises up nearly 2,000 meters above sea level), and the other mountains of the Marghine chain.

Car hire Sardinia need not break the bank and there are lots of hardy off-road vehicles available to rent at a cheap price.

Having a car can also be useful if you want to go to the surfers (and windsurfers) paradise of Isola dei Gabbiani and it is possible to request surf racks for your equipment as optional extras.

You need to rent a multi-purpose vehicle with lots of room, or a pickup truck if you plan on going scuba diving around the picturesque Tavolara Island.

Underwater adventurers will also enjoy the wonderful marine reserve around Sardinia, one of Europe’s finest ecological treasures, and this can be accessed from a district called Alghero.

Sardinia Map

Sardinia map

Sardinia is one of the regions of Italy but under the Italian constitution it has regional autonomy.

Although the locals speak Italian they also use the dialect of Sardinian. Oddly enough in Alghero, which has fantastic beaches and is well worth visiting, they speak Catalan.

The medieval town of Alghero is known as Little Barcelona because of its links with the Catalan capital.

However, Alghero can be quite a dangerous place to drive in due to the windy mountain roads and unpredictable motorists so care should be exercised at all times.

Your transport will come in handy though as a good way to see the magical palace – Palazzo D’Albis and the marvelous rocky bay which is Neptune’s Grotto.

Sardinia Food

Sardinia certainly has some of the cutest fishing villages in the Mediterranean such as the charming Stintino and its glorious beach, Pelosa.

You will find plenty of lovely taverns to try the local seafood and sauces, while the alcoholic drink Mirto is flavored by the berries of a bush that grows on Sardinia and is worth trying.

The Mirto berries are also used to flavor a Sardinian specialty of a roasted young pig or Porcheddu.

Most travelers to Sardinia go to the island’s capital Cagliari which has been constantly inhabited since ancient times due to its good position on a fertile plain.

Because of Cagliari’s position on the southern tip of Sardinia its port was an ideal place from which to set sail for Africa.

This was one main reason why the Phoenicians set up a colony in Cagliari.

Costa Smeralda Sardinia

Olbia Airport is the main airport in Sardinia, though it is also worth noting that there are airports at Alghero and Cagliari.

Olbia airport is alternatively called Costa Smeralda Airport and has the airport code OLB.

Olbia airport has 40 check-in desks and 10 gates and there are plenty of facilities for passengers there such as an ice cream parlor, a newsagent, and a pharmacy.

Olbia Airport

Olbia Airport has regular flights to a range of Italian and European destinations.

It is possible to fly to Sardinia through the low-cost carriers Easyjet, Jet2, Ryanair, Easyjet, TUIFLY and SkyEurope.

There are also routes to Sardinia with the airlines’ Air Berlin, Germanwings, Air Italy, and Meridiana.

Car Hire and Transport in Sardinia

Car Hire Olbia international airport is a cheap and efficient way to get to wherever you are going.

Sardinia does have some cheap bus services to Cagliari and other towns but whether you want to lug your baggage around is another matter.

Sardinia does get hot in the summer, so you may wish to request air conditioning, though the island has a cooling Mistral breeze blowing across it.

Throughout the year tourists can find cheap deals on every part of the Sardinia experience from villas and flights to low-cost cars.

The Emerald Coast

The first stop of our motorhome itinerary is Olbia, where you can admire beautiful 19th-century buildings such as the Town Hall and the Church of San Paolo.

Lose yourself in the steep streets of the historic center, visit the Mura Puniche and relax on the main beach of Pittolongu.

As soon as you leave Olbia in your motorhome, you will be enchanted by the landscape: the blue of the sea and the green of the Mediterranean forest will accompany you along the road to Golfo Aranci.

Let yourself be charmed by the natural beauty of the beaches along the coast. You can take a boat trip to visit beautiful coves such as Cala Moresca or try your hand at hiking.

Try to bump into some of the big celebrities by stopping by the luxurious Porto Cervo. Sardinia’s most famous resort is also a favorite destination for stars from around the world.

Drive back along the coast in your motorhome. Admire the lush vegetation and the typical white rocks of this area until you reach Palau.

Leave your camper in this seaside resort and take a ferry to Maddalena, the largest island of the archipelago, which is classified as a Natural Park.

Enjoy the panoramic view from the promenade that goes around the island and the wild beauty of the surrounding nature.

If you have time, we suggest you visit the other islands of the archipelago such as Caprera and Budelli, famous for their pink beach.

With its historic downtown and its market of typical local handicrafts, Santa Teresa di Gallura is a village worth visiting.

At sunset, you can see the white cliffs of Bonifacio, Corsica, turn a fiery red color. Castelsardo is another village worth visiting.

Perched on a cliff overlooking the sea, this fishing village will transport you back in time: narrow and steep streets, the smell of fish and tangled fishing nets are most authentic.

The Western Coast: from Asinara to Sinis

Traveling along the beautiful coast of Gallura in a motorhome, you will arrive at the northwestern tip of the island.

The main town, Porto Torres, is an ideal place to start a stay in Sardinia. Indeed, those who already own a vehicle can take their motorhome on a ferry from Italy.

For the others, we advise you to rent a motorhome from a private person in Sardinia.

Then head to Stintino, north of Porto Torres.

This splendid place, characterized by white sandy beaches and an extremely clear sea, will seem like a paradise! As the destination is very touristic, it will be difficult to find a parking place for your motorhome.

We recommend that you reserve a parking area in Stintino in advance.

Offshore, the island of Asinara, recognized as a National Park, offers a wild and preserved nature.

It is possible to visit the island on foot during excursions or by bike but also by boat.

Relax on the beautiful beaches and enjoy the many panoramic viewpoints to capture breathtaking landscapes.

Do not leave Asinara without meeting the white donkeys, typical of the island.

beautiful coast of Gallura

Going south on the western coast, stop at Capo Cassia to admire the white cliffs plunging into the turquoise sea.

From the limestone promontory of Capo, all you have to do is climb the 656 steps of a staircase carved into the rock to reach the marvelous Grotto of Neptune.

Take the road again to discover splendid panoramas and preserved archaeological sites, before arriving in Alghero.

Strongly influenced by Catalonia in the past, the city still maintains a strong link with this Spanish community and shines with its artistic and cultural wealth.

Enjoy an aperitif in one of the coastal towns and at sunset, dine on an excellent dish of spaghetti à la bottarga, a Mediterranean specialty.

Let’s take our motorhome route back to Bosa. The road between Bosa and Alghero follows the sinuous curves of the coastline and overlooks the sea.

Marvel at the spectacular scenery alternating between wild reefs, garrigue, and isolated coves.

Once in Bosa you will be seduced by the shimmering colors of its houses and the imposing castle that dominates the city.

Enjoy a pleasant walk along the Temo river and relax on the beach of Bosa Marina where you can watch a wonderful sunset while enjoying a glass of Malvasia, a famous local wine.

Our route continues south and the next destination of our itinerary in Sardinia is the Sinis Peninsula: a unique natural site where you can practice a multitude of open air activities.

Two stages are unmissable in our opinion: the natural formation carved in the limestone located in S’Archittu and the splendid quartz beach of Is Aruttas nicknamed the “Beach of grains of rice”. Reach the tip of the Sinis Peninsula and visit the incredible archaeological site of Tharros.

Continuing your journey along the Costa Verde towards the south, discover unspoiled and authentic places where you can relax or immerse yourself in the Sardinian folklore and culture.

The south and the Sardinian hinterland

Sardinian hinterland

The south coast of Sardinia will offer you unforgettable memories in the heart of preserved natural landscapes, much less frequented than the north coast.

Going down the coast, the next step of our itinerary in the south of Sardinia is the Costa dell’Inglesiente. From Cala Domestica to Piscinas beach, the steep and rugged landscape and the picturesque local culture will make you discover the most authentic Sardinia.

Before visiting the charming town of Iglesias, we recommend a stop to admire the 133-meter high faraglione.

This piece of rock detached from the coastline is nicknamed Pan di Zucchero or Pain de Sucre in French.

Don’t miss the island of Sant’Antioco, connected to the mainland by a short bridge. Take advantage of this opportunity to go on a boat trip and visit some heavenly coves.

Continue south along the Strada Panoramica della Costa del Sud, a beautiful coastal road.

Continue the route in the area of Sulcis to discover its kilometers of beach frequented by many surfers before arriving in Chia. We recommend a visit to the dunes Su Giudeu and Sa Colonia.

Not far from there, the charming village of Palu opens its arms to you.

Go to the nearby promontory to visit the magnificent archaeological site of Nora: an ancient Phoenician and Roman city.

We are coming to the end of our itinerary but for some Cagliari can be an ideal starting point to rent a motorhome in Sardinia thanks to the many low-cost flights that go there.

The Sardinian capital is a very characteristic city with its thousand alleys, its art corners, and its Mediterranean flavors.

From Cagliari continue along the Strada Panoramica to Villasimius where the view of the Mediterranean is breathtaking.

Villasimius is a splendid marriage between paradisiacal beaches and luxuriant vegetation, with turquoise and crystalline waters that remind us of the Caribbean.

Our route continues towards the beaches of the Costa Rei. The road to take can be perilous in a motorhome, but the landscapes from your vehicle will dazzle you every time.

If you want to get a glimpse of the charm of the Sardinian hinterland, continue your journey to Orgosolo, a town decorated by numerous murals.

On your way, don’t be surprised if you come face to face with a flock of sheep carelessly crossing the road.

Nearby, explore the Gennargentu Park, a mountain range that is home to exceptional flora and fauna.

The Many Beautiful Sardinia Beaches

Before you book your villa in Sardinia you will undoubtedly be thinking about just where to go.

Many people visit this perennially popular Italian island in order to enjoy a superb beach holiday.

Indeed, if this is your goal you will not be disappointed.

Here are some of the top beaches that Sardinia has to offer.

Cala Luna

This may not be the easiest beach to get to in Sardinia but the journey is well worth the effort. You will find it tucked in the northwestern reaches of the island.

Many Italian families take their holidays here, which should tell you something about its genuine appeal.

The crescent-shaped beach has the advantage of soaring limestone cliffs behind it, further adding to its stunning appearance.

Li Coggi

When you leave your villa in Sardinia for the day you want to know you have a gorgeous beach nearby.

If you choose to stay in the Porto Cervo area, towards the northeastern corner of the island, you’ll be rewarded with the Li Coggi beach.

The waters are lovely and shallow here and unbelievably blue, so they are popular with families and ideal for more nervous swimmers to enjoy too.

Su Giudeu

If this beach in southern Sardinia seems familiar when you visit it, don’t be too surprised. It has been used in several films and adverts, thanks to its picture-perfect appearance.

The beach consistently comes up as one of the best ones on the entire island, so if your villa in Sardinia happens to be nearby, take the time to visit for a day at least.

La Pelosa

The clear, clean waters here will make all but the most reluctant swimmers bypass relaxing on the beach altogether in favor of a relaxing dip.

You will enjoy the fine, white sands too, as you recline on this wonderful location in the far northwestern corner of Sardinia.

Goloritze

This beach can be found on the eastern coastline of Sardinia.

When you find a beach situated on a coastline that is regarded as a treasure by those who live there, you know you have struck gold.

Leave behind your villa in Sardinia for the day in favor of a relaxing few hours on this particular beach, with its gorgeously clear waters and soft sands.

How do you choose the best beach for your needs?

how to choose best beach

When considering the best beaches to visit on the island it is best to choose the area you want to stay in first.

Many parts of the island have more than one beach to offer, so if you choose wisely you can be sure of having your choice of several beaches to visit during your stay.

As you can see from the above highlights, there are plenty of them that are popular among thousands of visitors every single year, showing off the island at its very best.

So which beaches will you see in person when you go to Sardinia this year? Start counting…

Looking for an exciting getaway? Don’t wait any longer and rent the perfect vehicle to travel around Sardinia in motorhomes, vans, or camper vans.

If you decide to go on vacation or have already visited Sardinia, feel free to share your logs, photos, and travel stories on our Blog, Facebook page, Instagram account, or Twitter.


How to Travel Cirque of the Towers – Wind River Range {Ultimate Review}

Cirque of the Towers Wind River Range

The Wind River Range’s colossal granite peaks have long captivated the imaginations of those who live in and pass through the region.

The Wind River Range, located in western Wyoming, stretches northwest to southeast for around 100 miles and is part of the Western United States’ larger Rocky Mountain range.

Because of its high concentration of tall, beautiful mountains with high-quality rock, the modern Wind River Range is a very popular outdoor recreation area in the Western United States.

The Wind River Range’s craggy peaks are part of the United States’ great Continental Divide, a hydrological divide that stretches from Alaska’s Bering Strait to Argentina’s Strait of Magellan.

If you stand on one side of the divide, all of the water will flow into the Pacific Ocean. Any rain that falls on the other side of the divide will end up in the Atlantic.

The Wind River Range contains 228 named mountains, the highest and most visible of which is Gannet Peak (13,802ft/4207m), Wyoming’s highest peak.

Though Wyoming’s second-highest peak, the Grand Teton, is in the Teton Range, the state’s next 19 tallest mountains are all in the Wind River Range.

In reality, the Wind River Range has over 40 named peaks that are over 13,000 feet (3,962m), adding to the beauty of the landscape and the challenge of traversing the terrain.

The Shoshone National Forest on the east side of the range and the Continental Divide and the Bridger-Teton National Forest on the west side of the range are responsible for the vast majority of the Wind River Range.

A large portion of the range is also included within the Wind River Indian Reservation.

What you can See and Do in the Wind River Range?

Major Trails and Hiking Areas

The Shoshone National Forest, on the eastern side of the Continental Divide, the Bridger-Teton National Forest, to the west, and the Wind River Indian Reservation, to the south, make up the Wind River Range.

There are three wilderness areas that cover the bulk of the range within the two National Forests.

The Bridger Wilderness, the Fitzpatrick Wilderness, and the Popo Agie Wilderness are among these wilderness areas.

No mechanized or motorized travel is permitted in these regions, making them ideal destinations for those seeking peaceful solitude in the mountains.

Climbing

Although the Wind River Range is known for its backpacking, the numerous cirques – created over thousands of years of glacial activity – and technical ascents attract climbers of all abilities and backgrounds who seek their own wilderness nirvana every year.

The Cirque of the Towers, in particular, is a well-known climbing area in the Winds that has seen an uptick in popularity in recent years.

Gannett Peak

Gannet Peak, at 13,804 feet, is the highest point in Wyoming and the Greater Yellowstone Ecosystem. It is situated in the northern part of the Wind River Range.

It is only for powerful and experienced mountaineers due to its remoteness, surrounding massive glaciers, and technical difficulties.

Cirque of the Towers

The Cirque of the Towers is the Wind River Range’s most scenic location. This magnificent range of jagged granite peaks towers over Lonesome Lake, making it one of the best places in the Wind River Range for adventure.

The shortest path to the Cirque of the Towers is through the Big Sandy Lake and Jackass Pass trails.

From the Big Sandy Trailhead, follow the Big Sandy River through trees and meadows before turning onto the trail toward Sedgwick Meadow and Big Sandy Lake.

Before crossing the meadow and returning to the forest, you’ll come to a wide meadow with vast views of Mitchell Peak, Dogtooth Mountain, Big Sandy Mountain, and Schiestler Peak after a few miles of walking.

If you take your time on this hike, you can reach the shores of Big Sandy Lake, where you can find some famous campsites just be sure to carry bear-proof food canisters.

After leaving Big Sandy Lake, you’ll climb steep switchbacks up a hillside before crossing North Creek.

You’ll pass rocky meadows, slabs, and outcroppings, following rock cairns and trail markers, before you reach a high point above North Lake.

You’ll reach a high point above Arrowhead Lake a few miles later, where you’ll get your first views of the Cirque of the Towers’ peaks, including Pingora, Wolfs Head, and Pylon Top.

You’ll start descending down slabs toward Arrowhead Lake after reaching this high point, then cross a boulder field to reach the base of Jackass Pass.

Steep climbing leads to the top of Jackass Pass, where you’ll be rewarded with spectacular views of the Cirque and Lonesome Lake.

As you continue hiking, you’ll encounter steep switchbacks that reward your efforts with spectacular views. You’ll eventually come to a trail intersection that leads to some campsites above the lake.

Titcomb Basin

When it comes to breathtaking mountain views, Titcomb Basin rivals the popular Cirque of the Towers (also in the Winds).

Furthermore, Titcomb Basin offers one of the two key routes to ascending Gannet Peak, Wyoming’s highest peak, which is widely regarded as one of the most challenging state highpoints to climb, after Denali (Alaska), Mount Rainier (Washington), and Granite Peak (Washington) (Montana).

Titcomb Basin is located in the heart of the range, just west of the Continental Divide. Four large alpine lakes, numerous boulder fields, and sharp, jagged peaks make up the Basin.

Getting to Titcomb Basin, however, is no walk in the park.

A trek into Titcomb Basin will take at least two days and cover at least 11.5 to 13 miles (18.5-20.9km).

The Elkhart Park Trailhead near Pinedale, Wyoming, is one of the easiest ways to get to the Basin.

Hikers can travel about 10.5 miles on an undulating path from the trailhead to Island Lake, which is located at about 10,400 feet (3,169 meters).

Hikers will walk about a mile (.6km) from here to a marked trail junction, where they will turn left to head toward Titcomb Basin’s spectacular views.

Titcomb Basin is located in the heart of the range, just west of the Continental Divide. Four large alpine lakes, numerous boulder fields, and sharp, jagged peaks make up the Basin.

Getting to Titcomb Basin, however, is no walk in the park. A trek into Titcomb Basin will take at least two days and cover at least 11.5 to 13 miles (18.5-20.9km).

The Elkhart Park Trailhead near Pinedale, Wyoming, is one of the easiest ways to get to the Basin.

Hikers can travel about 10.5 miles on an undulating path from the trailhead to Island Lake, which is located at about 10,400 feet (3,169 meters).

Hikers will walk about a mile (.6km) from here to a marked trail junction, where they will turn left to head toward Titcomb Basin’s spectacular views.

Top 10 Aquarium Tips for Beginners

0
Top 10 Aquarium Tips for Beginners

A stunning and captivating sight is a tank full of fish. For decades, people have marveled at the wonders of aquariums.

Unfortunately, we don’t always know all that goes into keeping happy, healthy fish before we begin. There’s a lot to think about before you launch.

It is not as easy as simply supplying food and water. Some fish don’t get along with others.

Individual fish have distinct personalities. Aggressive Fish need special tank mates or none at all, while Community Fish are good tank mates. This guide will assist you in avoiding the most common errors.

When you’re first setting up an aquarium, you’ll want to double-check that your tank is cycled correctly and that all of the equipment is in working order.

Aquarium Tips for Beginners

1) Choose an Appropriately Sized Tank

The size of the aquarium you want to buy is the first thing to think about. Most newcomers begin with a small tank of one or two gallons, assuming that this would be easier to maintain.

Larger aquariums are actually ideal for a beginner aquarist. For your first tank, it is highly recommended that you start with at least 20 gallons.

Of course, not everyone has space or the budget for a tank this big but start with the largest tank you can afford.

It’s also simpler to keep the water chemistry and temperature steady in a larger tank.

It’s also a good idea to have a tank that’s longer than it is tall so your fish can swim back and forth more easily.

Make sure your filter and heater are sized properly for your tank.

2) Find a Place for your Aquarium

It is important that you locate the perfect location for your fish tank. You’ll need a spot that isn’t near any walls (Sunlight causes algae blooms).

Often, keep it away from heaters and air vents.

It would also be helpful to choose a low-traffic area so you would be less likely to be inadvertently bumped or disturbed.

Check that your tank is level and that it is supported by a solid stand. It will create stress on that part of the tank if it is tilted in one corner, which could lead to cracks and leaks.

You’ll also want to make sure you have enough outlets nearby to accommodate all of your equipment.

3) Know your Fish

Consider carefully what kind of fish you want to hold. Depending on where they came from, aquarium fish have a wide range of needs.

Even though several species are classified as “tropical,” this does not indicate that they all have the same requirements.

You’ll need to find out what diet and water temperature you want, as well as the water chemistry you like.

It’s a smart idea to hold fish from the same area together because they’re more likely to have the same needs.

Also, think about how big each fish is expected to get, and avoid any species that could outgrow your tank.

To avoid putting predatory fish in your tank that would eat the other residents that you have worked so hard to care for, research their behavior.

4) Condition your Water

After you’ve decided on a tank, a spot, and the type of fish you want to hold, you’ll be itching to get some fish in your tank as soon as possible.
Try to be careful, and bear in mind that your fish’s water must be just right for them to survive. The first step is to use a water conditioner to remove the chlorine from your drinking water.

Chlorine is highly toxic to fish, causing necrosis (cell death) in their gills and suffocation. Never fill your aquarium with untreated water.

5) Cycle your Tank

This is the most crucial move, and it is often overlooked by those who are new to aquarium keeping. Ammonia, which is toxic to fish, is released into the water by fish waste.

To help with this problem, special bacteria must form in the filter. Ammonia is converted by one type of bacteria into nitrite, which is much more toxic than ammonia.

However, another form of bacteria transforms the nitrites into nitrates, which are harmless at low concentrations.

Cycling refers to the time it takes for bacteria to build up in your filter.

6) Perform Regular Water Changes

There are many different perspectives on how much and how often you can change your water.

It is largely dependent on how well-stocked your tank is in relation to its size. The most recommended rate of change is 10–15 percent per week, with 20 percent for tanks at full capacity.

Lightly stocked tanks will go longer (up to two weeks) between water changes. To vacuum debris from the bottom of the tank, conduct the water shift with a syphon.

Also, keep in mind that beneficial bacteria can be found in both the gravel or sand and the filter.

If you clean both at the same time, you can lose a lot of bacteria and potentially restart the cycle.

When cleaning your filter pads or sponges, make sure to use tank water instead of tap water to avoid destroying the bacteria.

In your tank, do not use soaps or other cleaning materials.

7) Don’t Overstock your Tank

It is important that your tank does not get overcrowded. Stress and disease result from an overstocked tank.

You should not, however, put a fish that is expected to grow to 10 inches in a 10-gallon tank.

Fish growth is supposedly driven by tank size, according to popular belief. Please only select species that will grow in your chosen tank.

8) Do not Overfeed your Fish

Feed small amounts of food when getting to know your fish, and make sure your fish is consuming everything before adding more.

Just give your fish what they’ll eat right away. Extra food should not be floating around in the tank.

Feeding your fish twice a day is normally sufficient, but make sure you study your fish species and understand what they need. Remember that fish, like humans, thrive on a varied diet.

9) Use Caution with New Fish

When you want to buy new fish, it’s a good idea to have a quarantine tank on hand. This is particularly true for oceanic saltwater fish, but it is also beneficial to freshwater fish.

You may be able to skip this step if you know your fish source is trustworthy, but it’s still safer to be safe than sorry.

A single sick fish can easily kill an entire tank. Choose your fish carefully, avoiding those with damaged fins or gills.

If you see any dead fish in the tank, you can either wait for another day or go to a different fish shop.

When you’ve chosen the fish you like, float the bag in your quarantine tank for at least 15 minutes to allow the temperature of the water in the bag to gradually match that of the water in the tank.

10) Use caution with treatments and chemicals.

Do not use any chemicals or therapies in your tank until you are fully aware of their immediate and long-term consequences.

Take Advantage Of Autumn Relaxing Nature – Read These 5 Benefits

0
Autumn Relaxing Nature

Autumn is one of the four seasons on Earth that follows summer and precedes winter. This season is also known as fall, and it is marked by significant changes in nature and the climate.

Autumn brings with it a plethora of enjoyable and outdoor events. It adds a number of colors to people’s lives, including yellow, red, orange, brown, and others..

Animals begin to prepare for the winter months, plants cease to produce food, and nature as a whole begins to sleep.

Temperatures drop; in some locations, hurricanes are likely, and the autumn season is marked by heavy rains.

The key indication of Fall, however, is when the leaves begin to change colour and everything becomes more majestic and beautiful.

Plants that throw their seeds on the ground or in the wind, as well as some animals, will eat them or use them to prepare for the winter. Autumn is a harvest season.

Autumn is a drab season, but it is a “delicious” season due to the abundance of fruits and vegetables available.

Farmers and gardeners gather apples, pumpkins, pears, corn, and other crops because the first frost can strike at any time, wiping out all of their hard work. Around this time of year, the moon is also brighter, and several new stars may be visible.

Why is autumn so beautiful?

Autumn is a truly lovely season. The colors are warm and vivid, erasing the blanket of green leftover from the previous season.

The landscape seems to become richer, the fruits and food seem to be riper and more delicious, and the countryside comes to life.

It’s absolutely stunning! With the vibrant colors and the crunch of the leaves as you step through them.

The way they flutter in a leisurely manner from the trees. On those crisp autumn days, people enjoy getting dressed up and going out.

As the autumn season approaches, several lovely changes occur. It’s a season when colors shift, moods shift, and the weather shifts.

The romantic element of this season appeals to many people.

Here are a Few Reasons Why Autumn is so Beautiful

  • The trees change color and seem to be very lovely.
  • The ground along the streets and parks gleams with autumn radiance.
  • The planet seems to be becoming more atmospheric.
  • There’s no shortage of leaves to kick.
  • There are plenty of leaves to leap into as well; many people enjoy making leaf piles and dropping into them.
  • It’s the time of year when the rainy weather is at its peak.
  • The mornings are golden and hazy.
  • The weather takes on a dreamy quality.
  • The fashion industry is booming.

 Importance of autumn:

Autumn is notable because the Fall Equinox symbolizes the harmony of the seasons as well as the balance of light and shadow.

The fall season allows us to re-establish a healthy relationship with the planet. Fall, like spring, is part of a lovely cycle of death, rebirth, and re-growth.

The ground’s dead leaves and branches decompose and become part of the soil, serving as seeds and fertilizer until the cold weather gives way to warmer weather.

During this time of year, farmers and critters alike work diligently to secure the necessities of existence.

As animals do for their hibernation spaces, we as humans work to protect our comfortable abodes.

The Benefits of Hiking in Autumn

Hiking is a wonderful way to get out and about. It’s exciting, needs little equipment, and can be performed almost anywhere.

Being outside provides a constant opportunity to clear one’s mind and de-stress. Hiking is a full-body exercise that strengthens the lower body and improves cardiovascular health and stamina.

It’s also adaptable to all fitness levels: you can customize the duration, complexity, and intensity of your path. Hiking can be a leisurely stroll through the woods or a strenuous mountain climb.

The pleasant temperature is one of the absolute advantages and a clear bonus for autumn.

As a result, hikers on tours are not frantically searching for the next shady spot and are not forced to wear cool towels around their necks.

Health The colors, Temperatures, and Foods of Fall may Boost your Mood

Fall is a magical time of year, with apple picking, corn mazes, cooler weather, and piles of colorful leaves.

As the new season starts, you may be encouraged to pursue healthier behaviors such as exercise and a good diet.

Autumn foods and activities, on the other hand, can be beneficial to your physical and mental health.

Autumn’s cooler temperatures make outdoor workouts more enjoyable.

Grab your gear and head outside, whether you’re a runner, yogi, or someone who is fascinated with high-intensity exercise.

  • Cool, crisp weather is ideal for outdoor exercise
  • Fall colors can actually improve your mood
  • There are plenty of in-season fruits and vegetables

Things we use in the Autumn Season?

There’s a chill in the air, the leaves are changing color, the store is brimming with pumpkin spice-flavored items, and Halloween decorations have arrived.

Fall has arrived in full force.

It’s starting to feel a lot like autumn, and we couldn’t be happier! Every season, we like to make a list of fun activities or small rituals that we want to do before the season ends.

Here are a few fun ideas to add to your list if you’re in the same boat.

  • Apple Picking
  • Bonfire with Friends
  • Corn Maze
  • Drink Hot Cider
  • Eat a Candy Apple
  • Fall Festival
  • Go Camping
  • Hot Air Balloon Ride
  • Invite Family and Friends Over
  • Jump in Piles of Leaves
  • Knit a Scarf
  • Make a Pie
  • Neighborhood Potluck
  • Pumpkin Carving
  • Road Trip
  • Yoga

You can Listen to Autumn Music for Relaxation on YouTube

The sight of falling leaves is lovely, but the sound of leaves crunching underfoot is even more so.

Anxiety, depression, and a variety of other stress-related issues can be helped by listening to crunching, cracking, and hissing sounds.

You should listen to music while enjoying autumn, which will relieve tension and make you feel rejuvenated.

POPULAR ARTICLES